One Room Challenge: Week 8 - Dining Room Reveal!
Whew, the last eight weeks have flown by! So this is the end of the Fall 2021 One Room Challenge; it’s time for the big reveal!
As a first-time participant of ORC, I wasn’t quite sure what to expect from this challenge. Would it be more challenging than I thought? Would I be able to keep up with weekly blogs as a rookie blogger? Would anyone even follow along? Would I be able to make my vision come to life?
In the end, keeping up with the project and weekly blogs was more complicated than I thought, BUT it was so rewarding, and now I know that I can do it! And to my surprise, people did follow along and give support along the way; I’ve “met” new people who are doing incredible things and who are so encouraging. I’m excited to keep building this community even though ORC is coming to an end. Finally, I was able to make my vision come to life, and it is SO MUCH better than I thought it would be. This dining room is the largest project I’ve ever done, and it’s the first time I’ve thought through every design choice in a space. Almost everything in this room is special to me somehow, and I’m extremely happy to have completed this project by myself and on time!
Now let’s get into the dining room transformation!
Before


Our dining room has looked like this pretty much since we moved in. We painted the walls before we moved in, and that was it. It was definitely time for some change!
Let’s recap the things I wanted to do in the space.
Build floating shelves
Refinish dining chairs
New light fixture
Hang curtains
Remove chair rail
Replace baseboards with 1 x 4 trim
Paint ceiling and walls
Paint tile grout
After
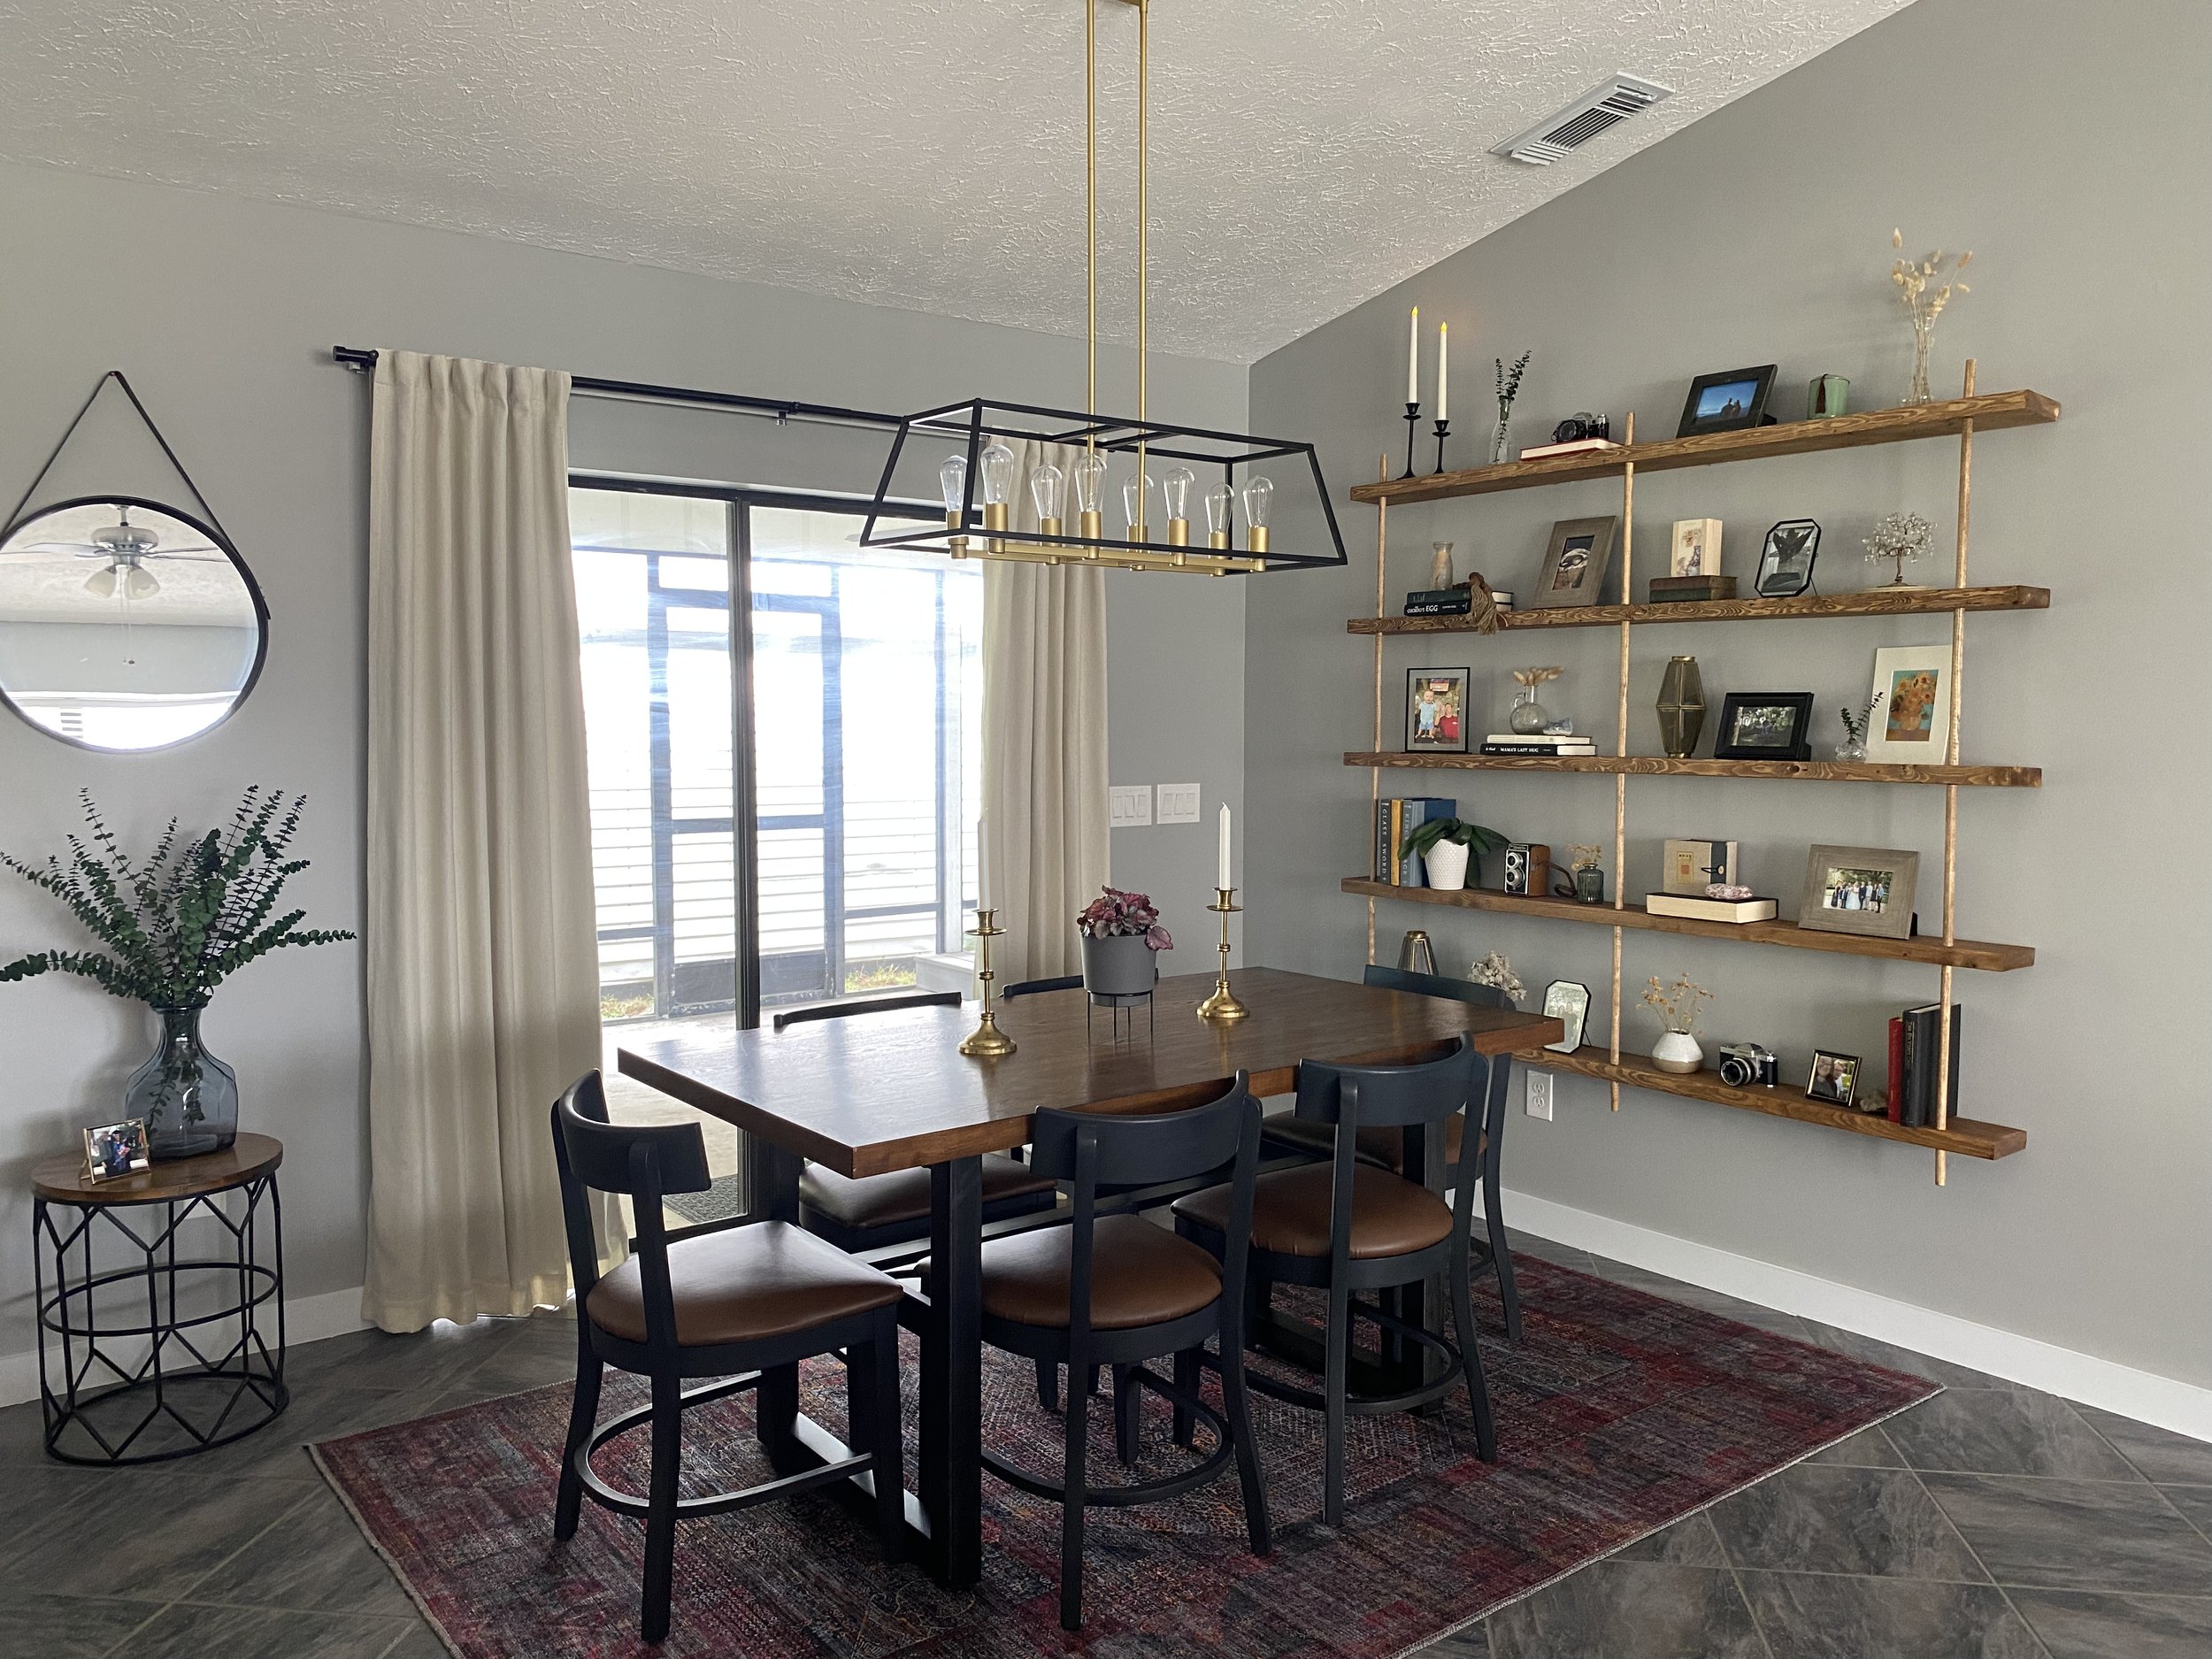
The completed dining room

View of the dining room from our kitchen

View of the dining room from our living room

View of the dining room from hallway
Floating shelves

DIY shelves

Inspiration shelves
The inspiration for these shelves was from Fixer Upper: Welcome Home Episode 1. I loved that they filled up the whole wall without feeling too bulky. I installed 2 x 6 boards to the wall to recreate the shelves using floating shelf brackets then glued 3/4’’ dowels in between each shelf. These shelves are by far my favorite DIY project I’ve ever done. I’m so proud of how they turned out! Most of the decorative pieces on the shelves were things I already had that never really had a permanent home in our house. I love looking at everything gathered in one special place.
Curtains

We have vertical blinds covering our sliding glass door, which are great for privacy but not aesthetically pleasing. My husband did not want me to remove them, so I found a compromise. I bought brackets that attach to the top part of the vertical blinds so you can hang a curtain rod. It’s a great renter-friendly hack if you can’t remove your blinds but still want to hang curtains. The vertical blinds are still functional, but you can barely see them behind the curtains! The curtains are linked here.
New baseboards and door casing


New baseboards and door casing
The baseboards in the whole house are very small, and they were installed before the tile making them look even smaller. So I’m replacing the baseboards and door trim in the entire house, one room at a time. I used 1 x 4 primed pine boards for our new baseboards and door casing. The new trim makes the whole room look updated. I also added trim around the case opening leading to our hallway, making the space feel finished.
Refinished chairs

Dining chair before

Dining chair after
We got these chairs about four years ago. A friend of my sister’s worked at Outback Steakhouse, and they were throwing away all of the chairs at the restaurant because they got new ones, so we snatched these up for free! They matched our table pretty well, so I never bothered to do anything with them until now. I painted the chairs with black chalk paint and recovered the cushions with faux leather. They look 1000 times better!
Goodbye for now ORC . . . until next spring!
I am still a little surprised that I did this whole project by myself in eight weeks. The One Room Challenge has pushed me in the best way, really helping me form this habit of blogging every single week while staying on track with a major project. I’m ready to enjoy our dining room for Thanksgiving next week (although it won’t look quite like this because we have a larger group for dinner)!
Since our dining room is connected to our living room and kitchen, I definitely have my work cut out for me to update those spaces as well. I hope you will stick around to see the rest! Follow me on Instagram for updates if you’re not already. And be sure to check out some of the other ORC participants reveals here; there are some really great ones!
I hope you all have a happy Thanksgiving next week! Thanks for following along.